Sunday, 1 November 2015

Glam Werewolf Tutorial - Simple Halloween Makeup #6


 I know this post is a touch late but even if Halloween has just about passed us by, I felt the need to represent the werewolf. I am after all Team Jacob so it's only right....plus I was far too happy with this look to not share it!

To create this look I used Urban Decay Naked Smoky and their 24/7 eyeliner in Perversion along with NYX Milk, an eyebrow pencil, a glue stick and my normal foundation and concealer. Pretty much all normal items that will be available in most makeup bags (and houses in general) or that can be easily substituted.

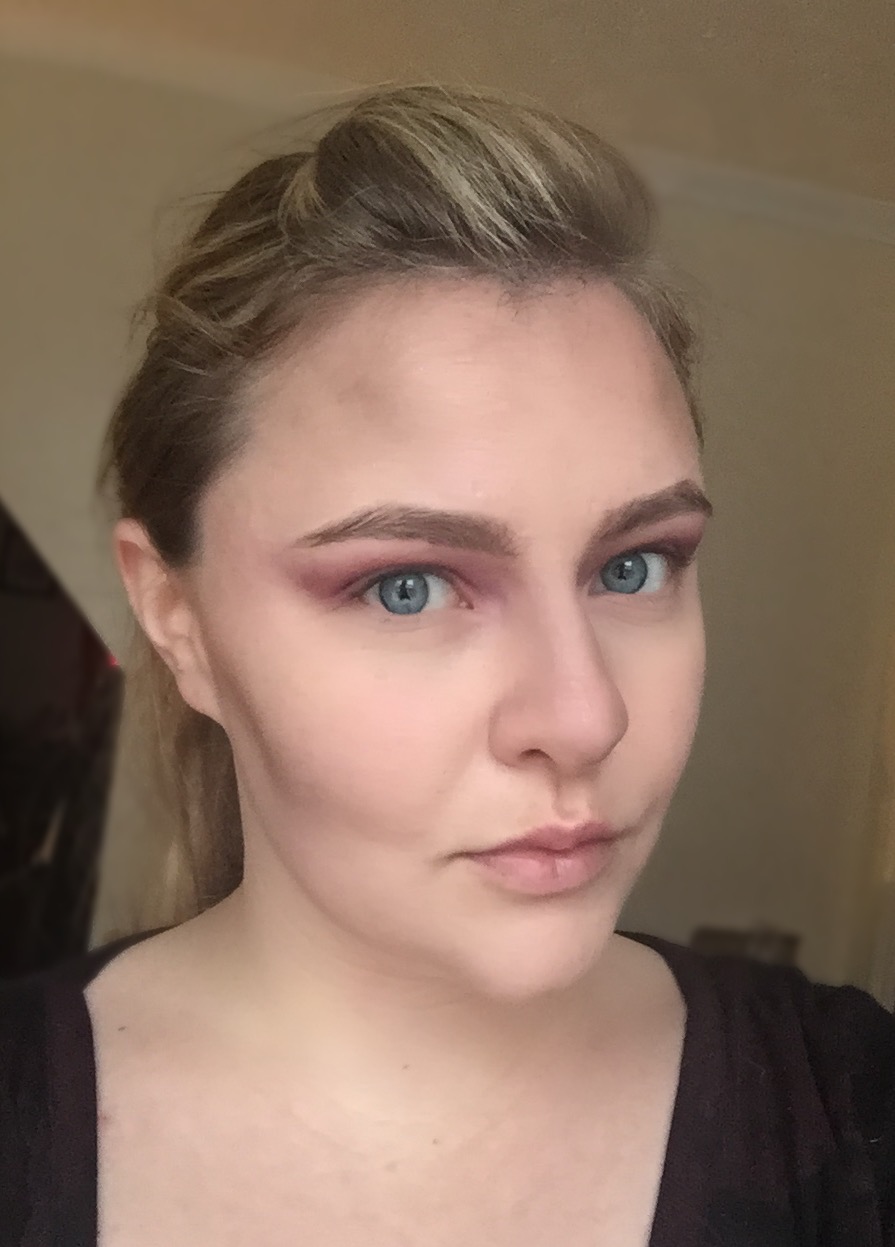
Since this is going to be quite a glam look, start off with creating a flawless base. I used Estee Lauder Double Wear and Benefit Boi-ing concealer as both of these are particularly long lasting and quite full coverage.

Next it's time to contour again, both to create some pointed wolfey looks but also to provide areas that we will turn into fur a little later on. As for most of  the Halloween looks I have created, we need to ramp up the normal contouring by using darker colours than might normally be used. In this case I used UD's Password and Whiskey but any matte greys or browns that you have to hand will work.

I decided I wanted to be a silver wolf so the colours I have chosen lean mainly on the grey side but you could easily change that up if you wanted to.


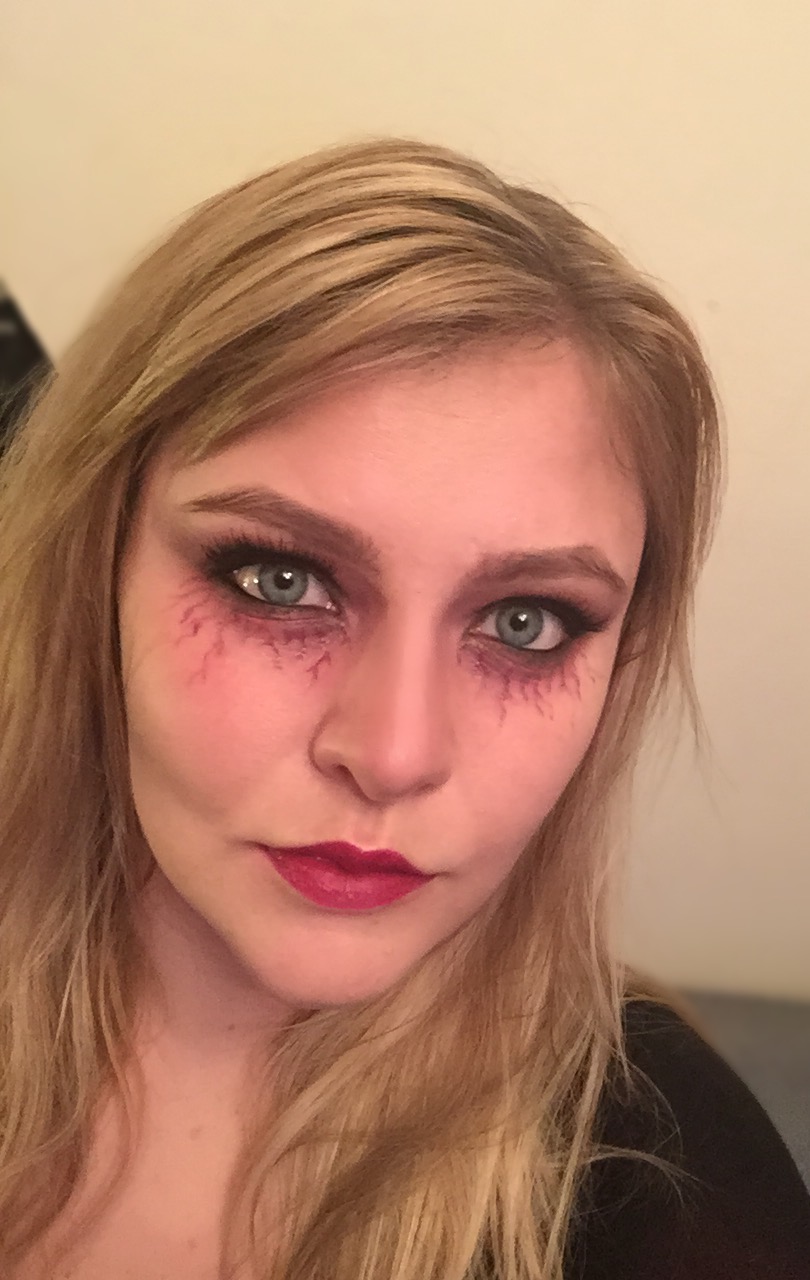
First things first, lets get some wolf brows going on! I was inspired to create this look by a well known makeup artist on Youtube called Chrisspy (check her out if you haven't come across her before, she's amazing!) so I mainly followed her steps for the eyebrows. I took a brow pencil and essentially traced the line of my eyebrow and carried it on in a straight line rather than following the arch. Use small feathered strokes here to create the illusion of actual hair. Take a spoolie brush and really fluff up your brows with quick upward strokes. If you like, you can also enhance your eyebrows by drawing in little hairs coming out of the top of your brow to give a wispy effect.


We then want to hide the tail of our real eyebrow! This took a fair bit of patience and time and is probably the fiddliest part of this entire look. The best thing to do is to use a glue stick (ensure it is non toxic) and brush it over the tail end, both against and with the hair. Once the hair is stuck down, give it a little time to set and then take a white eyeshadow or NYX Milk and some concealer and apply it to the area. You may need to do this a couple of times before the brows are completely hidden.


 To create the eye look, the idea is to try and give the illusion of slightly more oval shaped eyes. This can be achieved by pulling your eyeshadow up to a point that follows the angle of your eyebrow. Use an eyeshadow primer such as Urban Decay Primer Potion first to make the colours really pop. 

Then brush a shade close to your natural skin tone (I used UD Combust) all over the lid and up to the brow. This will serve as your transition colour once you add in the darker shades. Next take a light grey shade (I used UD Password) and brush it all across the lid and up to a point. I then went into the crease and up to the point with a darker grey (UD Dagger) and again with a black eyeshadow (UD Black Market). 

Using NYX Milk or a white eyeshadow on a small angled brush, create a pointed shape in the inner corner of your eye. This will make your eyes appear larger and more pointed.

To add a little more definition to the lid, apply either a white cream eyeshadow or NYX Milk all over it. Then pack on a grey eyeshadow with a shimmer (UD Slanted and Armour) over the top.


At this point, take the same grey and black eyeshadows under your eye and up to the side of the light coloured point. Also use a black kohl eyeliner on your water line and smudge it across your top lashes. To finish off the eyes, add some fake eyelashes if you are planning on using them and then layer on a volumising mascara.

Now it's time to add the fur! Using a grey shadow on a firm brush, draw in little hairs along your cheek contour and all around the edges of your face.


For the lips I wanted to create a silver ombre effect to go with my silver wolf look. You could easily choose a different colour though if you wanted to mix it up a little. To create the lip, I applied NYX Milk as a base and then a silver eyeshadow all over. For the ombre effect, I used a black eyeliner and applied it as I would a lipliner and then gently blended it using a lip brush to drag the colour out.


I felt a bit of glamour for my hair would work well with the intensity of the makeup and of course a fur wrap seemed like the ideal choice!


I hope you've enjoyed all of these Halloween looks that I have created this week and that you've had a great Halloween! Let me know what outfit you chose in the comments, I'd love to see what everyone came up with!
SHARE:

Wednesday, 28 October 2015

Glam Vampire Tutorial - Simple Halloween Makeup #3


In case you didn't guess from the picture, today's Halloween tutorial is going to be a (relatively) glam vampire look! Now first up, I apologise if the images are looking a little grainy in comparison to usual, I'm not entirely sure what was going on with my camera but hopefully they are still good enough for you to follow! I would have done it again but since we're on a schedule here I didn't want to risk missing a day!

I based this look on the rather beautiful people in The Vampire Diaries and the one thing they always have is perfect skin. So start off with your normal foundation / BB cream and concealer routine to give yourself a flawless base because lets be honest, you don't see a lot of spotty vampires running around!

Next, make your face look a little more angular with the wonders of contouring! If you aren't familiar with contouring, follow my guide here but rather than using just natural colours, use both a light grey and a brown as your dark colour (I used UD Password and W7 Sunkissed). This will really make your features stand out and gives the whole look a more dramatic feel.

Fill in your brows using either a pencil or gel (or both!), whichever you are most comfortable with to create a sharp look. I took my brows just a little further at the tail than I usually do just to enhance the look that tiny bit.

Now it's on to the main feature of this look, the eyes! Since we are going fairly heavy with the eyeshadow, I suggest using a good eyeshadow primer to keep the look in place. Plus it has the added bonus of really making the colours stand out!

I used Urban Decay Combust and Thirteen (from the Naked Smoky palette) in my crease first, blending right up to the brow. If you choose colours that are close to your skin tone or slightly lighter for this step, it will give a really smooth transition from the darker colours.

Next take a rich burgundy shade (I used Makeup Geek Bitten) and start applying it over the lid, blending into the crease and out into a point towards your eyebrows. Also take it right into the inner corner of your eye and lightly onto the side of your nose.


To give a really deep dark look, we want to create a dark base on the eyelid. This is best achieved by packing on a cream black eyeshadow or even a gel eye liner (I used Seventeen Gel Liner in Smoulder). To set it in place, cover the lid in a black eyeshadow and gently blend it into the crease so that you get a smooth transition into your burgundy shade. Take your time with this step as black can be difficult to work with, just keep adding in little amounts until you are happy!


Take the burgundy shade again and blend it under your eyes, taking it further than you normally would but trying to keep that overall pointed shape leading up to the eyebrows. Use a black kohl liner along your water line and a black eyeshadow to smudge just underneath the water line.

If you want to wear fake lashes, now is the time to add them. If you aren't a fan, leave them out! I used some natural look lashes that I wanted to test out from Primark which I was pleasantly surprised with!


To finish off the eyes, it's time to make the veins! If you have a purple lipstick, that will be perfect. If not, don't panic! If you have a red lipstick just swatch a fair bit of it on your hand and mix in a little blue eyeshadow. You could also use face paints if you have some on hand. I used Mac Rebel mixed with a little bit of blue eyeshadow to deepen it slightly. 

To create the veins, use a small lipstick brush and gently brush down from your lash line and create little lines. Think of it as if you are drawing the branches of a tree with little shoots coming off! I found it best to wipe off practically all the product and then draw the lines really faintly, building it up if needed. That way if you draw a bit of a dodgy vein, a cheeky little smudge and it's gone rather than needing a full on makeup remover episode!

I then used LA Girl Lipliner in Dark Plum all over my lip to create a base and Mac Rebel over the top. I felt a berry lipstick really complemented this look because of the burgundy tones around the eye but feel free to change it up. You can always take it to the next level and use a dark blue or black lipstick if you fancy it!


For the finishing touches, add some bite marks! Make two small circles on your neck with the burgundy shade and add a little black dot in the center to give it some depth. If you have some fake blood to hand, dot a little of it into the bite marks and add a little around your mouth for some extra authenticity! 

I'd actually bought some but it was a really bright red that frankly looked rubbish! So I actually used LA Girl Lip Paint in Tempt for my fake blood which I think turned out pretty well. If you have the same predicament as me, try and dig out a dark purple lipgloss or liquid lipstick if you have one and again, add a few products together if you don't have the right colour initially!


I hope you like this version of a vampire look! If you give it a go, please do tell me in the comments, I'd love to see how it turned out!
SHARE:

Tuesday, 27 October 2015

Comic Book Tutorial - Simple Halloween Makeup #2


With Halloween close by, I am spending this week coming up with a selection of easy makeup looks that you can create using pretty much just standard makeup bag items! 

Today, I am going to show you a super quick comic book transformation! All this look requires is a liquid or kohl eyeliner, red lipstick, foundation and some white cream makeup. At the moment you can pick up white cream makeup in pretty much any shop in the Halloween section but if you are seriously pressed for time, a cream based white eyeshadow will do the trick!

So first, pale yourself up! If you have the white cream makeup to hand, mix that in with a little foundation to make it paler than normal and then apply all over your face, neck and any other areas that will be exposed. If you don't have any cream makeup, after applying your foundation or BB cream of choice, lightly apply a white eyeshadow all over your face. Just for giggles, here is me looking extra pale...lovely.


Next, it's time to transform your features into over exaggerated goodness. If you have a liquid eyeliner in a felt tip pen form, that will be the easiest to use for this step but any kind will work. For your eyebrows, it's basically time to do all of the things you are always told not to do because we are going to over draw them big time. Think straight lines and block colour. 

Once that's done, draw a winged eyeliner, darken up the waterline and layer on some mascara. If you have a reliable (aka non smudgey) eyeliner to hand, also draw a line following the crease of your eye. Draw the line just above the actual crease itself to really make your eyes pop. If you are prone to oily eyelids or you know your eyeliner tends to smudge, it's best to skip this step else you'll end up looking reminiscent of a comic book panda.

Then lightly outline the curve of your nostrils and add a faint line down the center of your nose. Ok I'm not going to lie to you, at this point you will look and probably feel utterly ridiculous. I didn't even attempt to get a half decent picture of this stage because honestly, it's scary stuff...and no I have no idea why my hair decided to resemble a birds nest at this moment...


Now it's time to work on the lips. Make sure your lips are nicely hydrated so you can get a smooth finish and pop on a bright red lipstick. Stay away from matte lipsticks for this look as it's all about the gloss in comic books! Next, carefully outline your lips with your eyeliner, slightly overdrawing to give that plump effect. Use a small amount of cream makeup to make a little half crescent on your lips as if they were reflecting the light.

Again take your eyeliner and draw a black outline around your entire face, following along your jaw line and just under your chin. Bonus of this part is that you can create yourself a killer jawline! Also draw in a few tendons on your neck and your collar bone just to make them stand out a little more.


To finish off, add in your comic book dots! With this it's best to use the cream makeup but again a pale cream eyeshadow will work. To get perfect dots, use the end of a makeup brush! Go as wild as you like with these, there are no rules! I went for a fairly limited amount but if you want to do a whole face full, there is nothing stopping you. I also added in a little crescent shaped line between my eyebrows at this point to make my character look a little bit sad. Feel free to add your own finishing touches such as adding in a few tears under the eyes or even adding some stick on jewels over your dots if you want to glam it up!


That's all there is to it! Would you give this look a go? Let me know if you do!
SHARE:
© Bristolian Beauty | All rights reserved.
Blogger Template Created by pipdig